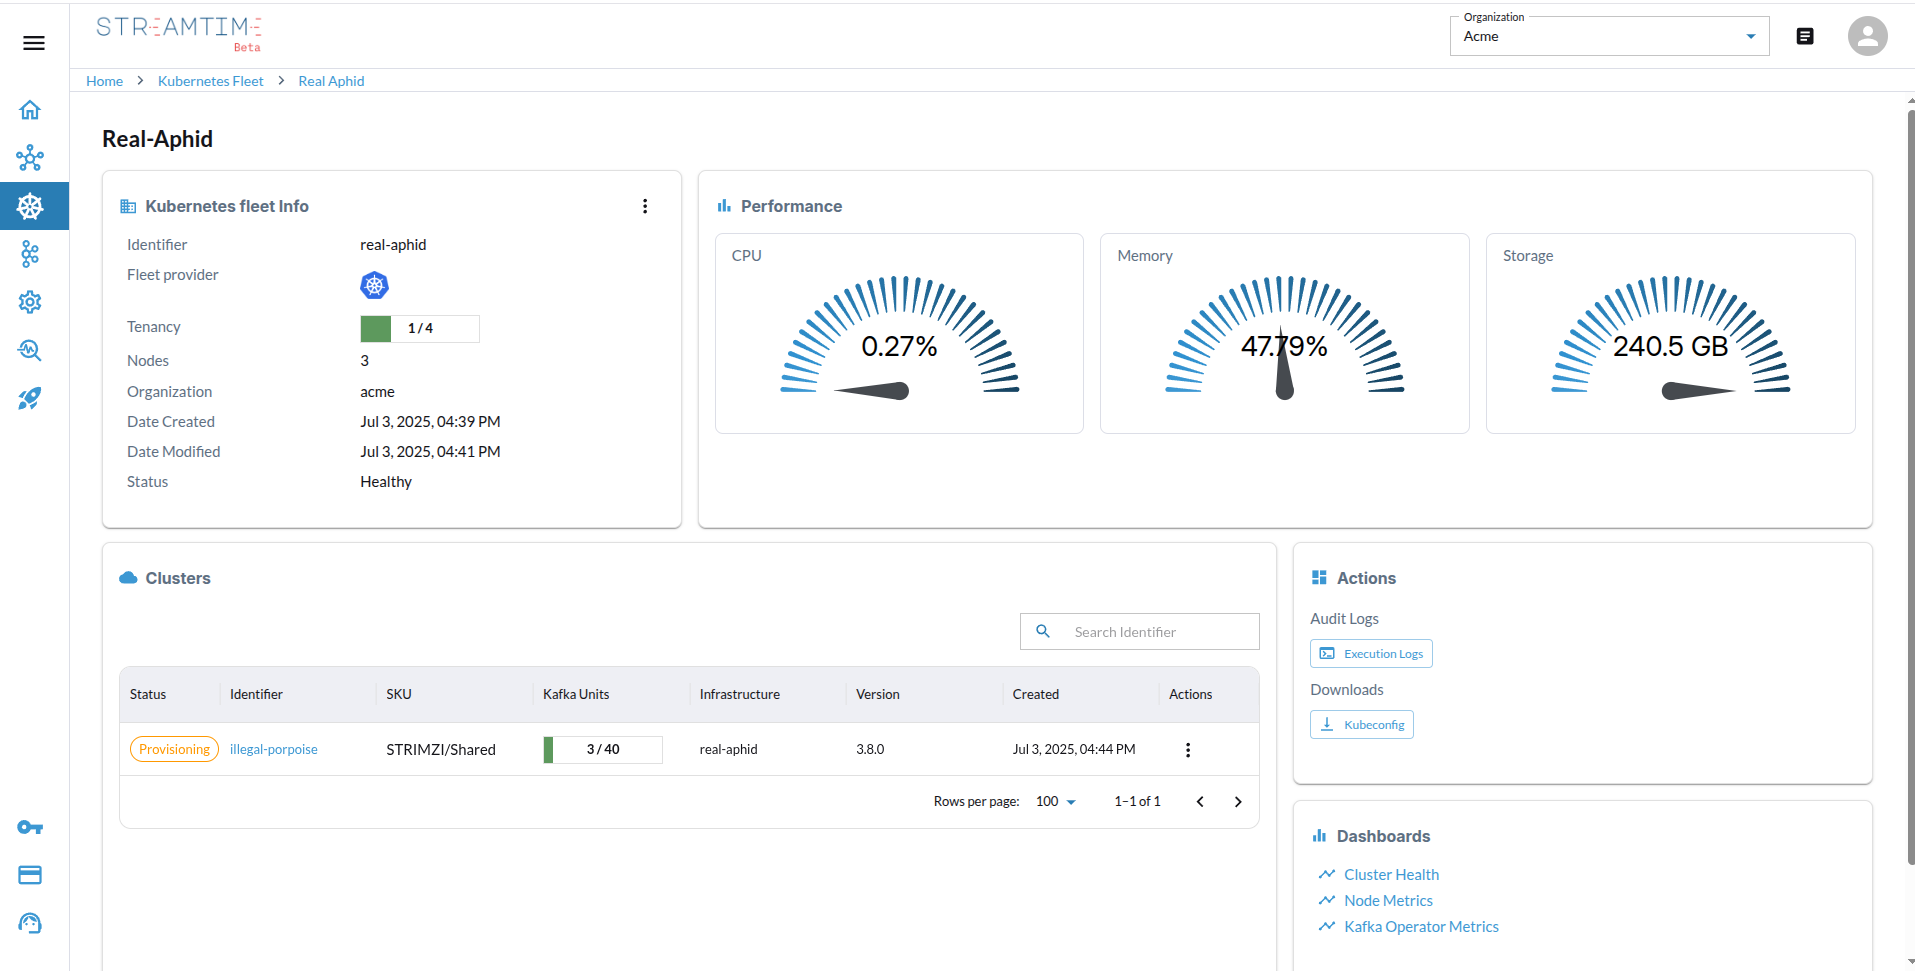
BYOK (“Bring Your Own Kubernetes”) runs Streamtime workloads on a Kubernetes cluster you already operate, instead of a cluster Streamtime creates in a cloud account. Streamtime installs its Agent and the services the fleet’s workloads need on your cluster; you keep control of the infrastructure.
When to use BYOK
You already run Kubernetes (on-premises, bare metal, or any cloud) and want to reuse it.
You don’t want to give Streamtime a cloud account.
Your workloads must stay in an environment with network or compliance constraints.
You want the fastest path to a first fleet for evaluation.
Key Features
Reuse your existing clusters and capacity.
The same Kafka and other workloads, monitoring and lifecycle as cloud fleets.
Shared, Isolated or Dedicated tenancy on your cluster.
Only what the fleet’s workloads need is installed, and removed again when you delete the fleet.
Prerequisites
A Kubernetes cluster with a LoadBalancer provider and a default storage class, sized for the workloads you plan to run. For EKS and OKE, see BYOK with AWS and BYOK with OCI.
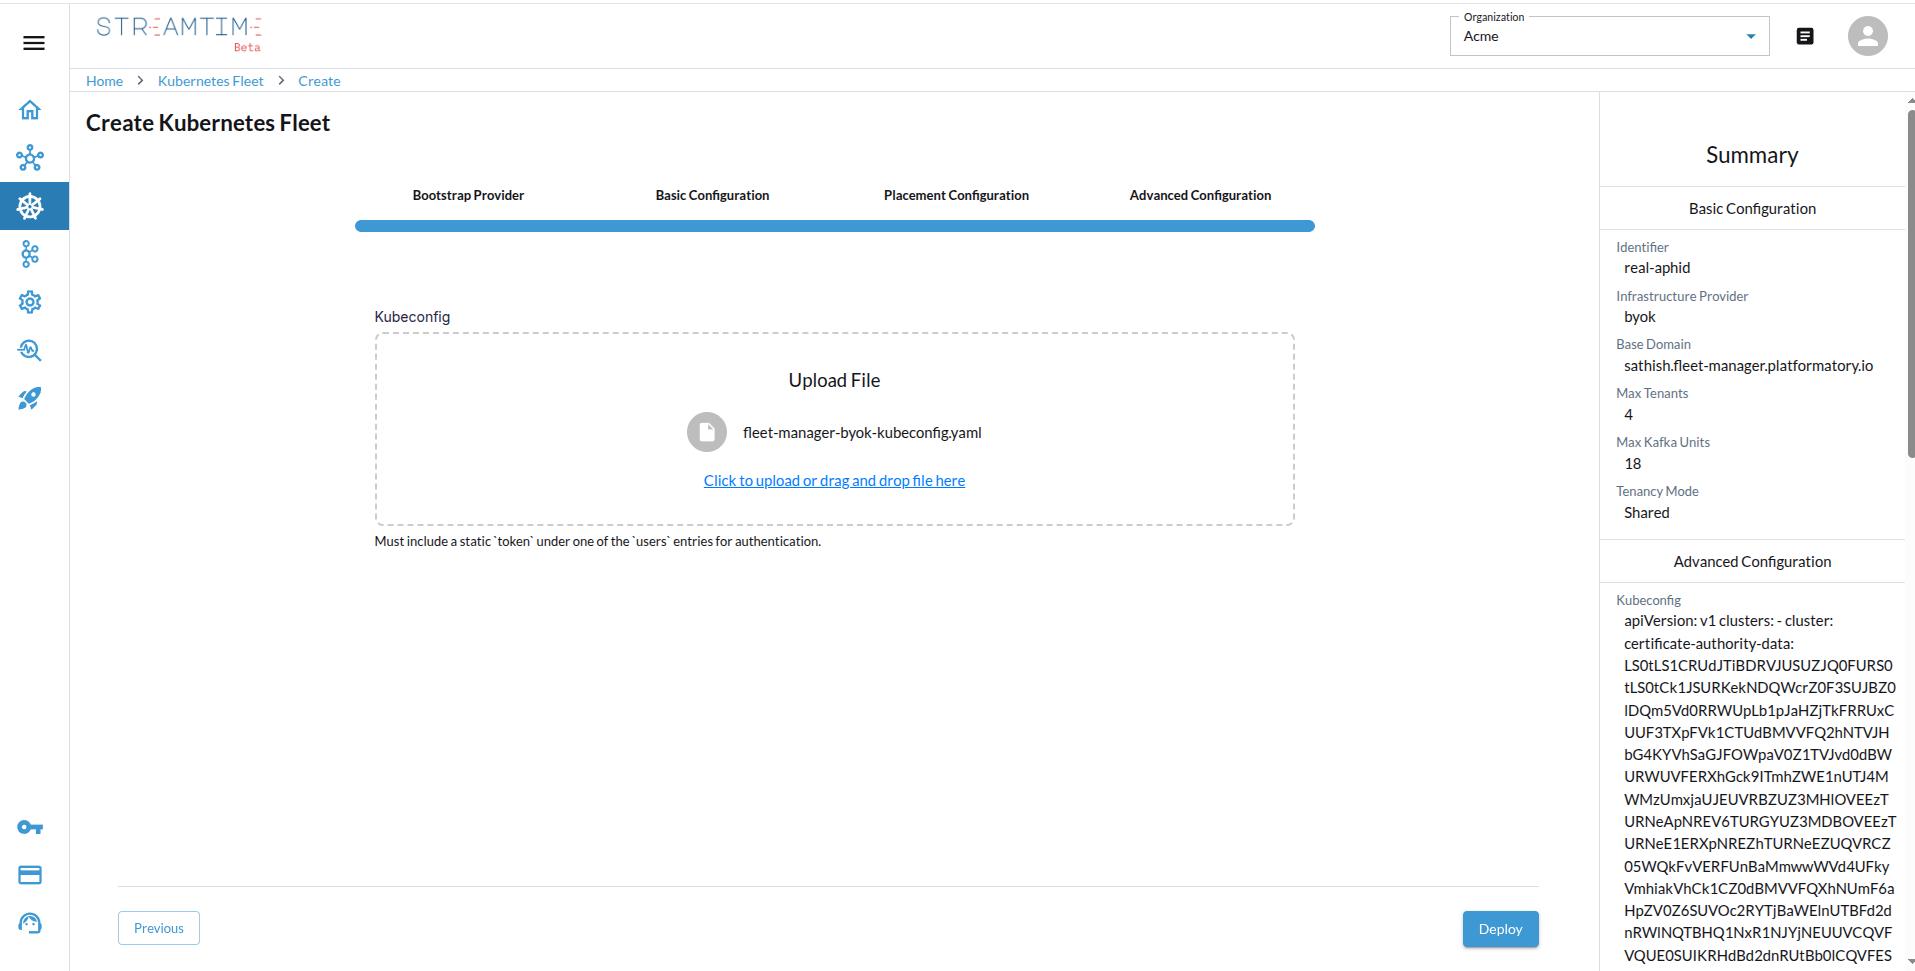
Access to install the Agent: either a kubeconfig Streamtime can use to install it for you (automatic), or kubectl and helm access to run the install commands yourself (manual).
A Base Domain for the fleet’s endpoints, added under Settings.
Fleet settings
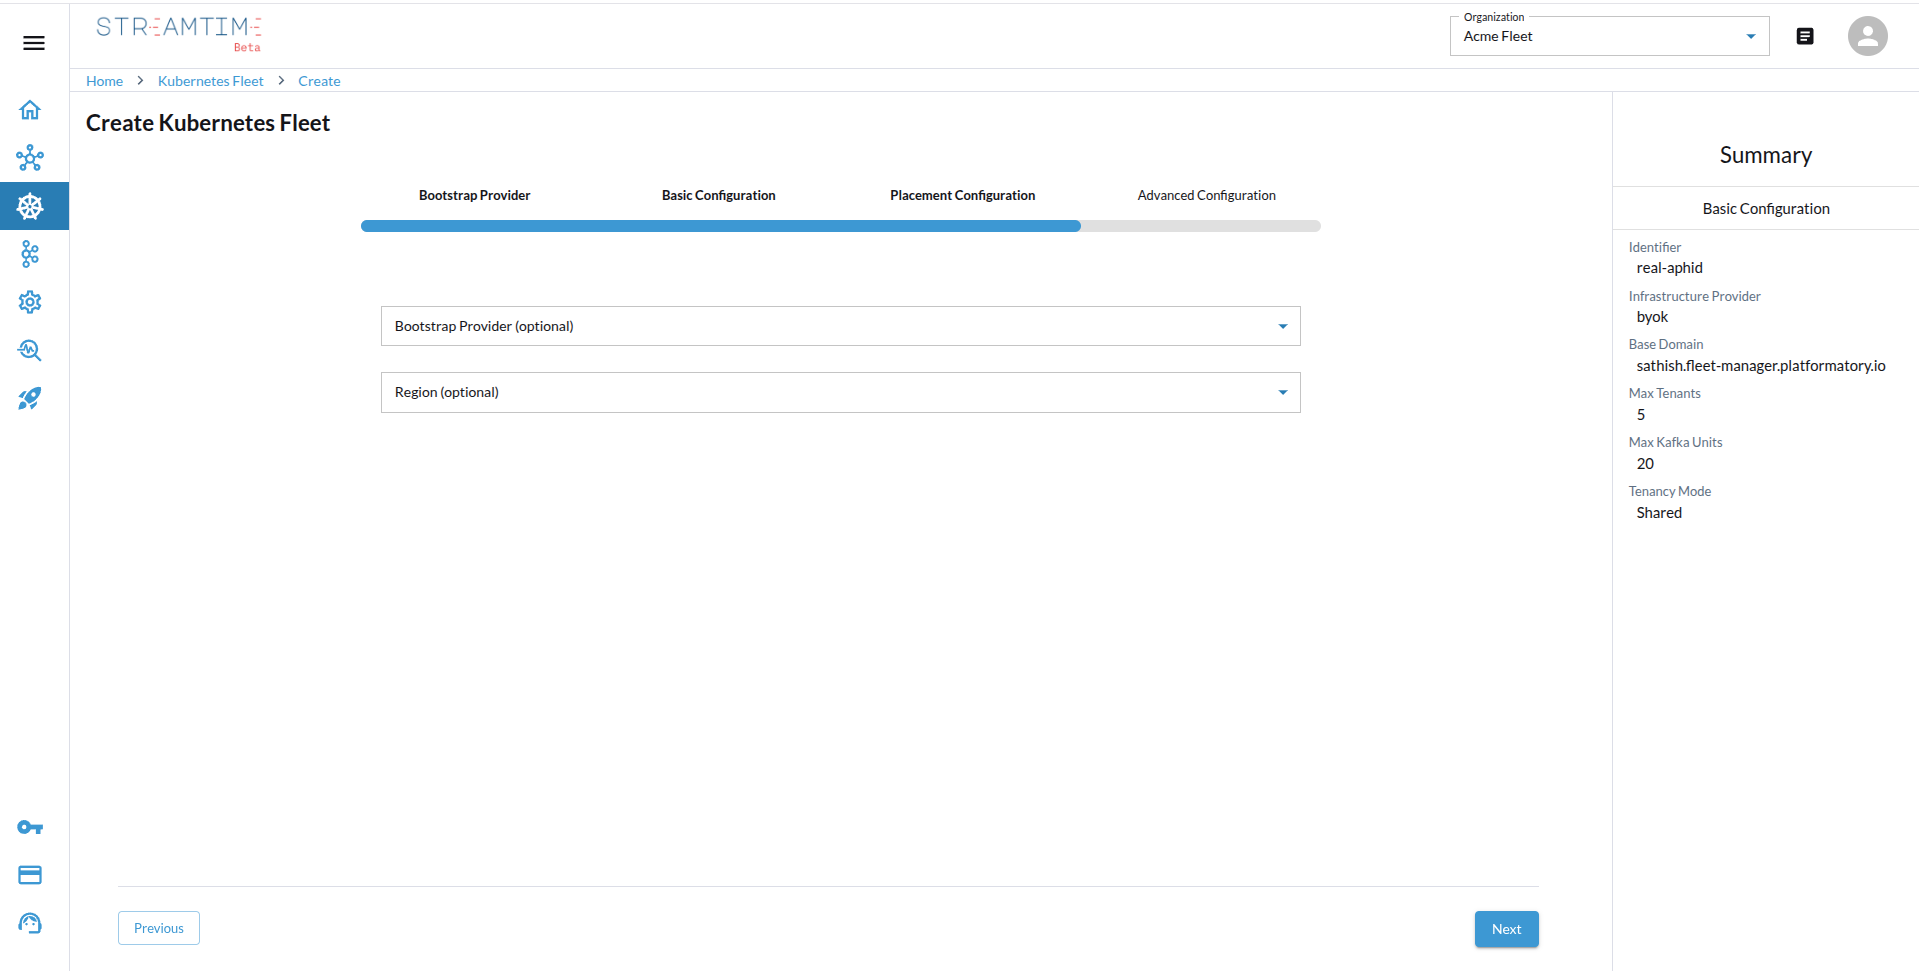
Placement Configuration (both optional, for your records)
Bootstrap Provider: the cloud your cluster runs on.
Region: where it runs.
Advanced Configuration
Namespace Whitelist: the namespaces Streamtime may use.
Workload Identity: lets Streamtime’s components use your cloud’s workload identity, for example for the logs bucket.
Resource Limits & Quotas: limits for what Streamtime runs.
Custom Labels and Custom Annotations: added to what Streamtime creates.
Tolerations, Affinity and Topology Spread Constraints: where Streamtime’s components and Kafka workloads are scheduled. A component’s own settings override these.
Logs Storage Bucket Name: optional; needs workload identity. Without a name, Streamtime generates one.
Before you start
A Base Domain for the fleet’s endpoints, added under Settings.
For the API: an access token in STREAMTIME_TOKEN and your organization identifier in place of <org>. Replace api.example.com with your Streamtime API address.
Only administrators and infrastructure administrators can manage fleets and cloud accounts.
packagemainimport("bytes""crypto/rand""encoding/hex""encoding/json""net/http""os")constapi="https://api.example.com/organizations/<org>"// newKey returns a random idempotency key.funcnewKey()string{b:=make([]byte,16)rand.Read(b)returnhex.EncodeToString(b)}// call sends one request with the access token and a JSON body (or none).// An optional idempotency key is sent as the Idempotency-Key header.funccall(method,pathstring,bodyany,idempotencyKey...string)(*http.Response,error){varbufbytes.Bufferifbody!=nil{iferr:=json.NewEncoder(&buf).Encode(body);err!=nil{returnnil,err}}req,err:=http.NewRequest(method,api+path,&buf)iferr!=nil{returnnil,err}req.Header.Set("Authorization","Bearer "+os.Getenv("STREAMTIME_TOKEN"))req.Header.Set("Content-Type","application/json")iflen(idempotencyKey)>0{req.Header.Set("Idempotency-Key",idempotencyKey[0])}returnhttp.DefaultClient.Do(req)}
No cloud account needed
A BYOK fleet uses your cluster’s credentials, not a cloud account, so there is nothing to register. Create the fleet, then connect the cluster.
Create a fleet
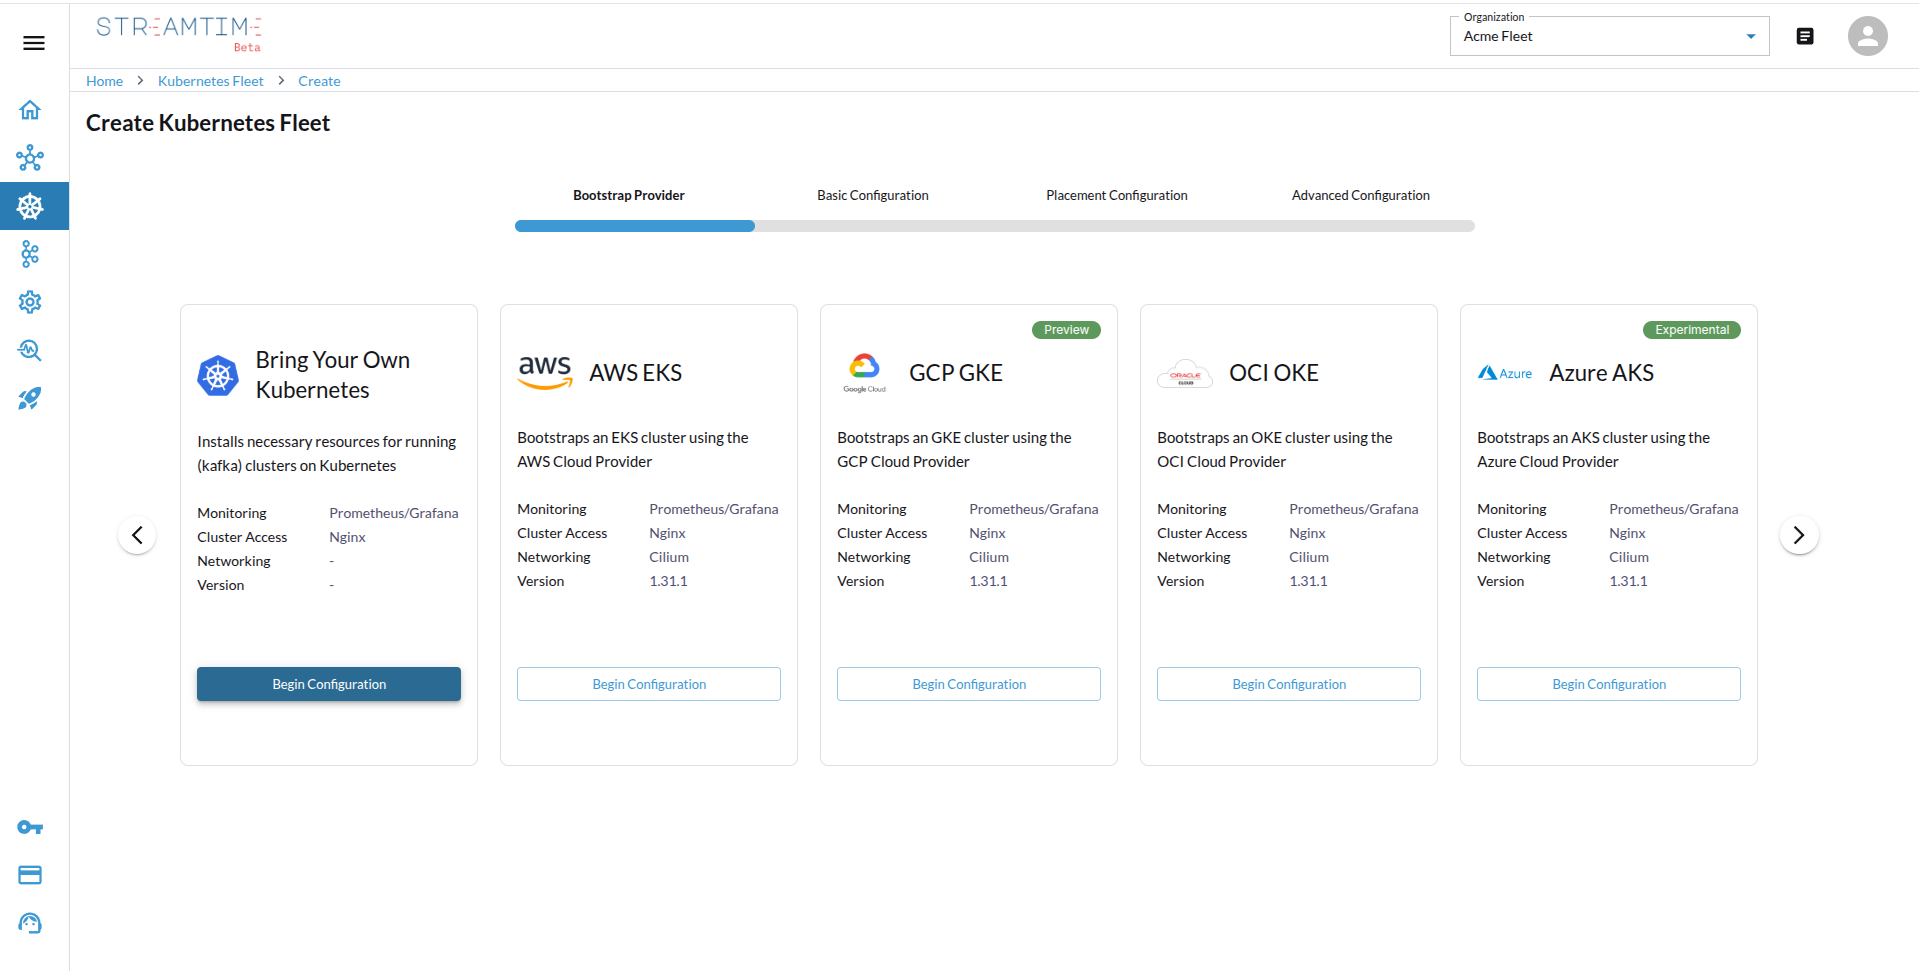
In the sidebar, select Fleet, then + Add Fleet.
Bootstrap Provider: choose BYOK, then select Next.
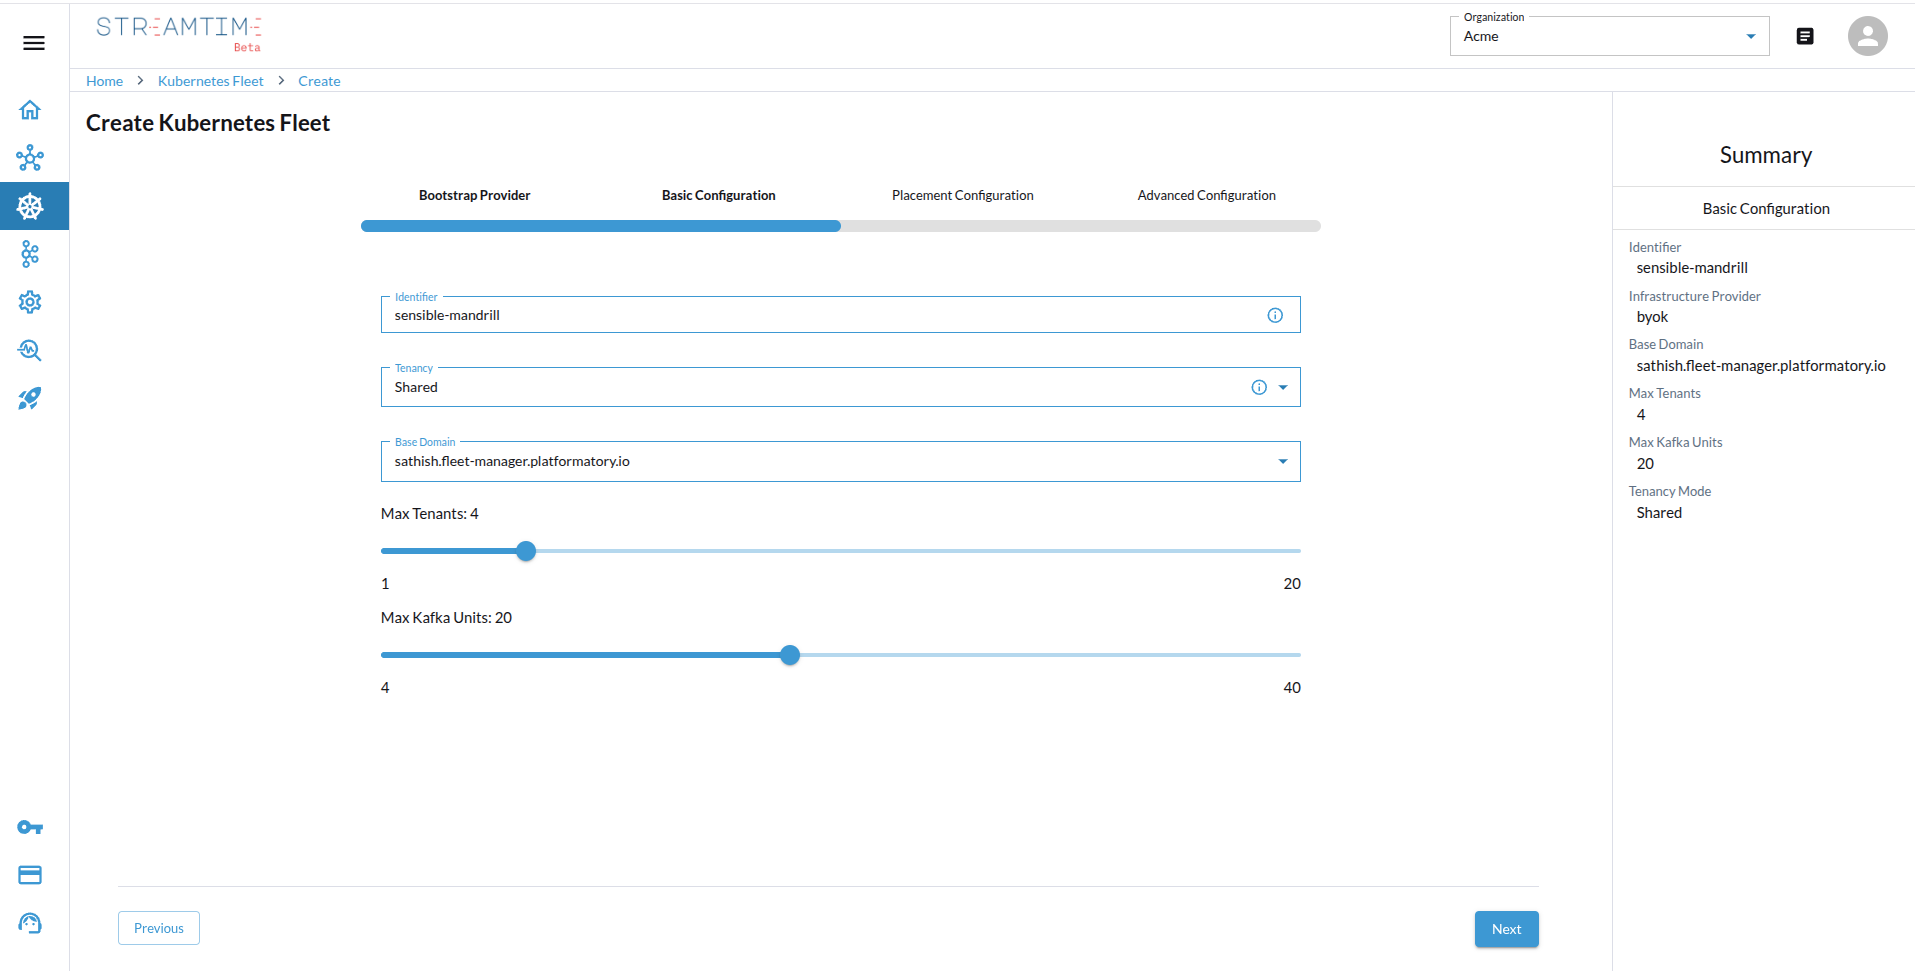
Basic Configuration: enter an Identifier, choose the Tenancy (Shared, Isolated or Dedicated), the Base Domain and Max Tenants. Under Workloads, choose what the fleet runs and the share of the cluster each workload gets.
Placement Configuration: optionally note the cloud and region your cluster runs on.
Advanced Configuration: review the settings, then select Deploy.
# 1. Save the fleet.
curl -X POST "$API/fleet/"\-H"Authorization: Bearer $STREAMTIME_TOKEN"\-H"Content-Type: application/json"\-d'{
"identifier": "edge-lab",
"provider": "byok",
"domain": "<base-domain>",
"tenancy_mode": "Shared"
}'# 2. Record it as ready for its cluster (send the "generation" from step 1).
curl -X POST "$API/fleet/edge-lab/reconcile/"\-H"Authorization: Bearer $STREAMTIME_TOKEN"\-H"Content-Type: application/json"\-H"Idempotency-Key: $(uuidgen)"\-d'{"generation": 1}'
identifier, provider and domain are required. Add placement_config and advanced_config for the settings above, and workloads to choose what the fleet runs (without it, every workload is enabled). Nothing is installed until you connect the cluster.
terraform apply saves the fleet and records it as ready for its cluster, the same two steps as the API. Then connect the cluster. To manage an existing fleet, import it by identifier: terraform import streamtime_fleet.edge_lab edge-lab. See streamtime_fleet.
Connect the cluster
Install the Agent on your cluster. Streamtime then sets up the fleet (“bootstraps” it) with the services its workloads need.
Open the fleet and select Agent Management.
Choose how to install the Agent:
Install (Automatic): select Create kubeconfig secret, upload your kubeconfig, then select Start installation. Streamtime installs the Agent and bootstraps the cluster.
Install (Manual): run the commands shown on the page against your cluster, tick I have completed the installation steps above and the agent is running in my cluster, and continue. Streamtime verifies the Agent’s connection, then bootstraps the cluster.
The steps (Install Agent, Bootstrap Cluster, and Verify Connection for a manual install) complete in turn; the page shows Cluster Bootstrapped when the fleet is ready.
Streamtime is strict about the kubeconfig format. See BYOK with AWS or BYOK with OCI for how to build one.
Automatic install. Store the kubeconfig, then start the install:
# 1. Store the kubeconfig (base64-encoded) for the fleet.
curl -X POST "$API/secrets/"\-H"Authorization: Bearer $STREAMTIME_TOKEN"\-H"Content-Type: application/json"\-d"{
\"provider\": \"builtin\",
\"path\": \"/organizations/<org>/fleet/edge-lab/kubeconfig\",
\"content\": \"$(base64-w0 < ./kubeconfig)\"
}"# 2. Install the Agent and bootstrap the cluster.
curl -X POST "$API/fleet/edge-lab/agent/InstallStreamtimeAgentWorkflow/"\-H"Authorization: Bearer $STREAMTIME_TOKEN"\-H"Content-Type: application/json"\-d'{
"registry_url": "<registry>",
"repository": "<repository>",
"mode": "fleet_bootstrap"
}'
Manual install. Get the install values, install the Agent yourself, then have Streamtime verify it and bootstrap the cluster:
# 1. Values for the Agent's Helm install.
curl -s"$API/fleet/edge-lab/agent/bootstrap/"-H"Authorization: Bearer $STREAMTIME_TOKEN"# 2. After installing the Agent, verify its connection.
curl -X POST "$API/fleet/edge-lab/agent/connection/verify/"\-H"Authorization: Bearer $STREAMTIME_TOKEN"# 3. Bootstrap the cluster.
curl -X POST "$API/fleet/edge-lab/agent/ByokProvider/"\-H"Authorization: Bearer $STREAMTIME_TOKEN"\-H"Content-Type: application/json"\-d'{"action": "CREATE"}'
registry_url and repository are where your Streamtime installation publishes the Agent; ask your Streamtime administrator. Each step returns 201 with the operation it started (409 if a verification is already running). Follow progress with GET $API/fleet/edge-lab/agent/: its status reaches bootstrap_complete when the fleet is ready.
kubeconfig,err:=os.ReadFile("kubeconfig")iferr!=nil{returnerr}// Also import "encoding/base64".resp,err:=call("POST","/secrets/",map[string]any{"provider":"builtin","path":"/organizations/<org>/fleet/edge-lab/kubeconfig","content":base64.StdEncoding.EncodeToString(kubeconfig),})resp,err=call("POST","/fleet/edge-lab/agent/InstallStreamtimeAgentWorkflow/",map[string]any{"registry_url":"<registry>","repository":"<repository>","mode":"fleet_bootstrap",})// Then poll call("GET", "/fleet/edge-lab/agent/", nil) until "status" is "bootstrap_complete".
Not available in the CLI yet. Connect the cluster from the UI or the API.
Not available in MCP yet. Connect the cluster from the UI or the API.
Check fleet status
A fleet’s Status is one of Incomplete, Pending, Provisioning, Updating, Restarting, Deleting, Healthy or Error. The Agent’s connection and the installed components show whether Streamtime can reach the fleet and what it runs.
In the sidebar, select Fleet. Each fleet’s status shows in the list.
Open the fleet. Overview shows its status, tenancy, Kafka Units and capacity. Endpoints lists its addresses, and Monitoring its metrics.
Agent Management shows whether the Agent is installed and connected, with the history of its operations.
# Status and provisioning state
curl -s"$API/fleet/edge-lab/"-H"Authorization: Bearer $STREAMTIME_TOKEN"# Collect a fresh health report from the fleet (waits for the answer)
curl -s-X POST "$API/fleet/edge-lab/status/"-H"Authorization: Bearer $STREAMTIME_TOKEN"# The Agent's connection
curl -s"$API/fleet/edge-lab/agent/"-H"Authorization: Bearer $STREAMTIME_TOKEN"# Installed components
curl -s"$API/fleet/edge-lab/installed-components/"-H"Authorization: Bearer $STREAMTIME_TOKEN"
In the fleet, status is the fleet’s state and reconciliation_state the state of its last operation (queued, running, succeeded or failed). GET $API/fleet/edge-lab/status/ returns the last health report without collecting a new one. The Agent’s status reads bootstrap_complete once it is installed and the fleet is set up.
resp,err:=call("GET","/fleet/edge-lab/",nil)// Decode "status" and "reconciliation_state" from resp.Body.resp,err=call("POST","/fleet/edge-lab/status/",nil)// fresh health reportresp,err=call("GET","/fleet/edge-lab/agent/",nil)// Agent connection
streamtime fleet list
streamtime fleet get edge-lab
streamtime fleet status edge-lab
streamtime fleet kubeconfig edge-lab --save ./edge-lab.kubeconfig
fleet status shows the last health report. Showing the Agent’s connection or the installed components isn’t available in the CLI yet.
Ask your assistant, for example: “Is the edge-lab fleet healthy?” or “What alerts fired on edge-lab in the last hour?”
It uses get_fleet_status (pass refresh to collect a fresh report), list_fleet_resources, get_fleet_alerts, get_fleet_logs and get_fleet_metric.
Update the fleet or the Agent
You can turn the workload node pool’s autoscaling on or off, and change the accounts that receive the fleet’s monitoring data. Streamtime can’t apply changes to a fleet’s placement or advanced settings yet: they are saved, but the update operation fails. To change them, create a new fleet.
The Agent is the Streamtime component that runs inside the fleet. Update it to a new version from Agent Management.
Open the fleet and select Agent Management.
Open the actions menu (⋮) and select Update Agent.
In Update Streamtime Agent, choose the Target (Worker or Operator) and the Registry, then set the Image Tag (leave it empty for the latest), or the Chart Version or Helm Values you want to change. Start the update.
The operation shows under Command History until it finishes.
# Turn autoscaling of the workload node pool off
curl -X PATCH "$API/fleet/edge-lab/"\-H"Authorization: Bearer $STREAMTIME_TOKEN"\-H"Content-Type: application/json"\-d'{"autoscale": false}'# Update the Agent to a new version
curl -X POST "$API/fleet/edge-lab/agent/UpdateStreamtimeAgentWorkflow/"\-H"Authorization: Bearer $STREAMTIME_TOKEN"\-H"Content-Type: application/json"\-d'{
"update_types": ["agent"],
"registry_url": "<registry>",
"repository": "<repository>",
"agent": {"image_tag": "<version>"}
}'
registry_url and repository are where your Streamtime installation publishes the Agent image; ask your Streamtime administrator. The update returns 201 with the operation it started. Follow it with GET $API/fleet/edge-lab/agent/.
resp,err:=call("PATCH","/fleet/edge-lab/",map[string]any{"autoscale":false})resp,err=call("POST","/fleet/edge-lab/agent/UpdateStreamtimeAgentWorkflow/",map[string]any{"update_types":[]string{"agent"},"registry_url":"<registry>","repository":"<repository>","agent":map[string]any{"image_tag":"<version>"},})// resp.StatusCode is 201 once the update has started.
Not available in the CLI yet. Update the fleet or the Agent from the UI or the API.
Not available in MCP yet. Update the fleet or the Agent from the UI or the API.
Delete the fleet
Delete every cluster and workload on the fleet first; Streamtime refuses to delete a fleet that still hosts one. Deleting the fleet removes the resources Streamtime created for it.
In the sidebar, select Fleet.
Open the fleet’s menu in the list, select Delete, and confirm.
The fleet shows Deleting, then disappears from the list.
Returns 202 with the delete operation it started. 403 means the fleet still hosts Kafka clusters; 409 means it still has Kafka Connect clusters, replicators or virtual Kafka clusters. Delete those first. Poll GET $API/fleet/edge-lab/: it shows Deleting, then returns 404 once the fleet is gone.
fromstreamtime_sdk.api.fleetimportorganizations_fleet_destroyresp=organizations_fleet_destroy.sync_detailed(ORG,"edge-lab",client=client)print(resp.status_code)# 202; 403 or 409 while workloads remain
resp,err:=call("DELETE","/fleet/edge-lab/",nil)// resp.StatusCode is 202 (403 or 409 while workloads remain);// poll GET /fleet/edge-lab/ until it returns 404.
streamtime fleet delete edge-lab --yes
Not available in MCP yet. Delete the fleet from the UI, API or CLI.
Or remove the streamtime_fleet block and run terraform apply. Terraform starts the delete and waits until the fleet is gone (the delete timeout). Streamtime refuses the delete while the fleet still hosts workloads, so remove those first.
Deleting a BYOK fleet removes what Streamtime installed on your cluster. The cluster itself, and its baseline (networking, load balancer, storage), stay as they are.